Wednesday, March 24, 2021

Hades Game Analysis

You can find the video version of this analysis here.

Overview

Hades is an isometric hack and slash rogue-like game developed and published by Supergiant Games. Development began following the release of their previous title, Pyre, and Hades was initially released as an early-access title in December, 2018 on the Epic Game Store. This was followed by an early-access release on Steam one year later, in December, 2019. The full version of the game was released in September, 2020.

Dramatic Elements

Hades is an extremely story heavy game. Consider this your spoiler warning, although if you are familiar with Greek mythology, you might not find much that surprises you.

Characters and Story

In Hades, you play as Prince Zagreus, the son of Hades and Persephone. He is an instantly likeable character - he is funny, determined, and interacts sympathetically with everyone he speaks to. Prior to the start of the game, he had been led to believe that Nyx, the personification of night, was his mother, but after discovering that Persephone was his true mother, he determines to escape the underworld and reach her. The game follows his struggle to reach her and learn more about why she left.

Besides Zagreus, there is a huge cast of characters. You will interact with Orpheus, the famous Greek singer of legend, and his muse Eurydice. Your trainer in combat was the famed Achilles himself, and you will also meet his friend/lover Patroclus. Sisyphus will give you aid during your journey, and you will battle against the Furies - Alecto, Tisiphone, and Megaera, the hydra, Theseus and the minotaur, Asterius, and finally against your own father, Hades.

Most of the gods need no introduction, so I shall just mention them here - Zeus, Ares, Athena, Aphrodite, Poseidon, Demeter, Hermes, Dionysus and Artemis. Upon learning of Zagreus's desire to escape, they will all grant you boons during your journey, and you can also receive assistance from Chaos, different companions, and by finding Daedelus's tools.

Of course, you will further a relationship with your father, Hades, and you can pet your dog, Cerberus. The maid of House Hades is Medusa, and you can have friendly competitions with Thanatos, the god of death.

As you try to escape, you will undoubtedly die many times, respawning back in the House of Hades. Once you respawn, you may further any relationships or storylines that you have started with different characters. Once you have interacted with them, they will be locked until you try to escape again.

Eventually, you will defeat your father, escape the underworld, and meet your true mother, only to discover that you cannot stay on the surface for very long, thus forcing you to battle your way out of the underworld again and again in order to reach her and learn more. You learn the backstory of your mother and father: Persephone wanted to get the F out of Olympus, and Zeus arranged for her to escape with Hades. The other gods, however, have no idea that this has taken place, believing her simply to have vanished. Demeter, Persephone's mother and thus your grandmother, is in mourning for her missing daughter, causing the surface to be covered in perpetual winter.

Your continued visits will eventually convince Persephone to return to the underworld, allowing the player to trigger the true end of the game: you will continue to develop your relationship with your father, mother, and the Olympic gods, and you will finally invite all of them to a big soiree revealing that Persephone had eloped with Hades and given birth to Zagreus. As an explanation for why Zagreus would continue to battle his way to the surface, when his mother is back home, the developers have created a great excuse: his escape attempts are basically now penetration tests, and Hades gives you the official task of finding weaknesses in the underworld's defences. After all, nobody is supposed to be able to escape. In anycase, at the party, Hades and Persephone explain that they kept her presence in the underworld a secret from Olypmus for fear of reprisal from the Olympic gods. Through your determined efforts, you become something of a hero for finally reuniting these two estranged families, that of the underworld and that of Olympus.

The game can continue to be played after this moment, since the underworld will always need tip-top security.

Besides the main story outlined above, you can complete several side quests, although reuniting estranged friends or family members remains the main theme. For example, you can reunite Orpheus and Eurydice, Achilles and Patroclus, and Nyx and Chaos. You can also complete "favors" for many of the Olympic and Cthonic gods, which is always some task related to the aspect of the god. For Aphrodite, you must complete the romance option for the three "romanceable" characters in the game, while for Poseidon you must catch 18 fish, and speak to him after catching a fish in that escape attempt.

Formal Elements

Players

Moving on the the formal elements, as is probably clear from the above, you can only play as Prince Zagreus.

Rules

Combat and Movement

Similarly to Supergiant's other titles, Zagreus's movement is restricted to a single plane, essentially controlling the same as an isometric hack and slash game. You start with a single weapon, the sword, named Stygius, but as you play the game you will unlock a spear, a bow, a shield, cestus, and a gun. According to the developers, these are like classes in an RPG: they broadly define how you will play a particular escape attempt. The sword has several broad slash attacks, a thrust, and an AOE ground stomp, while the spear has thrusts, a chargeable sweep attack, and a throw.

Each weapon has a regular attack and a special attack, and no matter what weapon you have, you can cast out a bloodstone to strike an enemy. There is also a dash for dodging. Depending on the weapon, you may be able to do a dash-attack and/or a dash-special. Some weapons also have charged attacks or charged specials, triggered by holding down the attack or special button, respectively.

Combat in Hades is extremely fast-paced, and in the later rooms you will have to deal with larger numbers of enemies than in the earlier rooms. The enemies also come in larger or more numerous waves. The different weapons allow you to use different play strategies. For example, the spear is useful for keeping enemies at a slight distance, as the thrusting attack and the thrown special allow you to deal damage from further away. Although the spear does have a charged sweeping attack, this is less useful for crowd control due to the time it takes to charge it up. The bow breaks the attack pattern of most of the weapons: it's attack is strong, but extremely slow to charge, having no regular quick attack. Its special is to fire a number of arrows in a spread pattern in front of the player, allowing for extremely effective crowd-control. As one last example, the shield has a somewhat slow attack, but charging it allows the player to block attacks in front of them and deal damage through a shield bash upon release.

As you progress through an escape attempt, you have a number of opportunities to create strongly synergestic builds. Although the particular boons and items you receive are randomly generated, by chosing appropriate ones you can create some spectactular builds. For example, once while using the cestus, I arrived at Hades with Aphrodite's Aid, Lightning Strike, Thunder Flourish, Divine Dash, Crystal Beam, Concentrated Knuckle, Stubborn Roots, and a host of other boons. The cestus starts out as one of the faster attacking weapons, but it has quite short range, and adding chain lightning to the attacks, and a thunder bolt to the special increases the range at which you can deal damage to foes. Concentrated Knuckle allows you to increase your base attack damage by +5 for each consecutive hit on an enemy, which is especially useful for enemies with a lot of health like the bosses. Stubborn roots lets your health slowly regenerate if you don't have any more lives left, which again is useful on tough bosses or encounters. Divine Dash lets you deflect damage received during a dash back at your enemy, allowing you to turn their own strength against them and maintain your health. Since you cannot block with the cestus, Divine Dash is really useful. Crystal Beam is a cast boon that alters the behavior of your bloodstones. Instead of throwing them, they drop at Zagreus's location, and fire a crystal beam that deals a small amount of damage every .2 seconds. These make the cast a kind of set and forget emplaced weapon. If you buff Crystal Beam with Glacial Glare (causes cast to inflict chill, which slows down enemies), or further combine it with Arctic Blast (applying ten stacks of chill causes a small explosion) or Killing Freeze (if all enemies are chilled they slow and decay), you have a quite powerful combination that can be used to control enemies in one area while you deal with another, or for a boss encounter, you can drop all of your bloodstones at once to concentrate their damage.

You will probably have different weapons that you prefer, and different gods whose boons match your play style better, but the variety of viable strategies is quite stunning and it is very satisfying to explore the state space on offer.

Regarding the enemies themselves, there is a pleasantly large variety. The first area of the game, Tartarus, features louts, thugs, numbskulls, wringers, and witches, among a few others. Louts are slow moving drunkards who perform a sudden charge attack, thugs are large slow moving enemies who do a telegraphed club smash, and witches are small enemies who float around the battle field and periodically cast orbs that will damage you. Most of these enemies can be killed in a few hits, although the louts and thugs usually take more.

The second area, Asphodel, features gorgons, different bomb throwing enemies, and several varieties skeletons. The skeletons all have different attack styles - bone-rakers are berserk enemies that attack in combos of 2-6 attacks, and wave-makers hurl crescent shaped waves at Zagreus. Many of the skeletons and the bomb-throwing enemies will jump around the battlefield, making it difficult to target the same enemy for an extended period.

Elysium features mostly different warrior types - brightswords, longspears, and strongbows, who when killed become a floating seed that can respawn as a new unit if it finds a discarded weapon. The final section, Temple of Styx, has the only living enemies in the game - rats and satyrs, who both can deal poison damage to the player. In any room in any area, occasionally, enemies will spawn in armored varieties, which means the armor must be chipped away before damage can be dealt to their health. Armored enemies cannot be staggered until the armor is removed, making it necessary for the player to watch for their tells more closely.

In a typical room encounter, you will face an initial wave of enemies, and you will have to use your dash, attack, special, and cast to deal with them effectively - dodging their attacks, slamming them into walls for extra damage, manuvering behind them for a backstab bonus, using room traps against them, and controling the space around you so you can manuever as you wish. After they have been dealt with, a second, third, fourth, and sometimes higher, wave will spawn in.

Once you clear a room, any poison, lava, traps, and enemy projectile attacks instantly disappear, preventing you from accidently taking damage.

Escaping and Choosing gear and boons

You begin your escape attempt by selecting your gear: the weapon, the keepsake and the companion you'd like. Each escape attempt is composed of a number of rooms. Most rooms have enemies in them, which must all be killed before you can progress to the next room. Other rooms hold NPCs that you may interact with and receive aid from. Others will be simple reward chambers, giving you a boon, health boost, or health replenishment. Still others will allow you to purchase items from Charon. After clearing a room, you must claim your reward. If it is a boon, there will be 3 choices to choose from.

Although the sequence of room choices is randomly generated each playthrough, the rooms themselves are hand-designed. The size of the room varies, and there will be well-placed low-walls and columns that can block enemy movement or projectile attacks if placed between the enemy and Zagreus, and a number of different traps as well.

The boons that the Olympic gods grant come in several varieties: each god has one boon for each of your main abilities; Attack, Special, Cast, and Dash, and additionally a Call. Only one of these boons may be equipped at a time, but you are sometimes given the chance to swap boons. The Call ability must be charged up by dealing or receiving damage, and once it has been charged enough, you may call on that god for assistance. This might take the form of transforming Zagreus into a spinning blade that deals damage, in the case of Ares's call, or in calling down lighting strikes that repeatedly damage nearby enemies in the case of Zeus. Besides these 5 boons, each god has 16 other boons. These are organized in different tiers and have different requirements and conditions for appearing. 7 of these boons are duo boons, meaning they require you to have one specific boon each from two different gods. How do we get the number 7? Although there are 9 gods you can receive boons from, Hermes does not have any duos, and he has no boons in the five categories mentioned before, and of course a god cannot have a duo with him or herself. As an example, Demeter and Poseidon have a duo boon called Blizzard Shot, which requires that you have Poseidon's cast boon (called Flood Shot), and one of Demeter's Aid, Frost Flourish, Frost Strike, or Mistral Dash. Once acquired, when you cast, your bloodstone will move slowly, pierce foes, and fire icy shards around itself.

The remaining boons are modifiers of different kinds. They might increase the potency of health increase items or health replenishment items, or they might add their god's signature effect to an action. Poseidon has a boon called Typhoon's Fury, which increases the amount of damage you deal when you slam foes into walls. Most of the gods have a revenge effect - Ares's is called Curse of Vengeance, which inflicts Doom on surrounding foes after you take damage.

Chaos gives you a unique set of boons to choose from - each boon has some drawback that will be active for a number of encounters, and after that the drawback deactivates and you receive the perk of the boon. The drawback or curse is separate from the boon, so you get a kind of randomly generated loot item a la Diablo. You might get Abyssal Soul: Abyssal is the curse name, which means for the next 3-4 encounters you will take a massive increase in trap damage (300%-400%); Soul is the boon name, which indicates a certain gain in max health (between 30-80, depending on the rarity). To get a boon from Chaos, you need to enter a Chaos portal, which will cost some amount of health, unless you have the keepsake from Chaos equipped.

After picking your reward, you must move on to the next room. Typically, you will have between 1 to 3 doorways to choose from, and you can see the type of reward above the doorway. So, you might have to choose between a Zeus boon and Demeter boon, or between a Daedelus upgrade and Obols, or many other combinations. For those mathematically inclined, if you have three rooms, there are 1140 combinations, or for two rooms there are 190 combinations. For one room, there are 20 possibilities.

House Development and Decoration

As you make repeated escape attempts, you will receive several different rewards. The boons from the gods disappear once you return to your house, as do any Obols you've collected. These are the gold coins placed on the tongue of the dead to pay Charon for the ride into the underworld. Gems, Darkness, Nectars, Keys, Titan Bloods, Diamonds, and Ambrosias will stay with you. Gems and Diamonds will primarily be used for improving the house. For example, you can pay 45 Gems to put down an Elysian Rug in the lounge. This has no gameplay effects, but allows you to control the look of the house, and serves as a sink for this resource. Or, you can unlock new songs for Orpheus to play by paying the required number of Diamonds.

Generally, projects that effect gameplay require a number of Diamonds. You can purchase rest rooms that will appear randomly in different regions, giving you a chance to replenish your health if necessary, but there are many other projects.

Relationship Development

Hades has been described as having dating sim elements, and this is somewhat true. Each character you can interact with has a heart meter indicating how much they like you. You can increase their heart meter by giving them gifts - initially nectar, and after you have maxed out their first rank (usually 4-6 hearts), you must give them ambrosia to continue to increase their heart meter. In the early stages of the game, you can also increase their heart meter by having a set number of conversations with them.

Increasing an NPC's heart meter has granular benefits. The first heart unlocked will give you a keepsake from that character which you can carry into battle to receive some perk. Giving them more nectars will unlock additional hearts, and reveal more backstory for that NPC, but has no effect on gameplay. For a limited number of NPCs, once all their basic hearts have been unlocked, you must switch to Ambrosia to unlock the next tier. The first Ambrosia will trigger the NPC to give you a companion keepsake, which functions something like a call. You can use the companion keepsake to receive help on a tough encounter or boss battle. So, Skelly's companion will spawn in Skelly himself, who will aggro the enemies until his health drops to zero. Unlike calls, these companion keepsakes can only be used once per encounter, although by spending Ambrosia to upgrade the keepsake, you can increase the number of times per escape attempt that each may be used.

Similarly to the conversations, giving a Nectar or an Ambrosia can only be done once per NPC per escape attempt, so you cannot farm Ambrosia, then max out your relationship with Achilles, Medusa or another NPC in one go.

Where Hades departs from most dating sims is in the lack of branching paths and in the ability to lose. In typical dating sims, you will be able to take different routes with each character. Some of them will lead to furthering your relationship, while others might actually lead to a loss of connection. None of this is possible in Hades. The closest Hades comes is whether you choose to consumate your relationship with the three romanceable characters.

Inventory

Hades has a very basic inventory system. There are no limits regarding the number of resources of any type you can hold, so you will not have to manage inventory slots or spaces. The most you will interact with your inventory is by trading. A trader shade eventually appears in the lounge, and you can sell gems for keys, keys for nectars, nectars for diamonds, diamonds for ambrosia, and ambrosias for titan bloods. The trader also sometimes has a limited offer, which might allow you to reverse one of the previous trades (selling titan bloods to get ambrosia, for example), or have a better deal (trade ten gem stones for one nectar).

Level up

Although Hades is a rogue-like game, like many rogue-likes in the last 11 years (I'm thinking of the games by FROM Software, Dead Cells by Motion Twin, Salt and Sanctuary by Ska Studios, and many others) not all the player's progress is lost upon death. You do return to the House of Hades, and you do lose all the Daedelus weapon upgrades, health upgrades, Obols, and boons from gods that you had collected during your previous run, but you don't lose Diamonds, Keys, Titan Bloods, Ambrosias, Darkness, or Nectars, and some of these are the key to advancing your character.

The weapons are all unlocked using different numbers of keys. These are one of the randomly generated room rewards, and you can also trade gems to get more keys at the trader in the lounge in the House of Hades.

Titan Bloods are mainly obtained by defeating the Furies and Hades for the first time with a weapon on a particular Heat level (we'll talk about Heat later). You will learn more about each of your weapons as you play, and you will eventually find that there are different aspects to each weapon. These aspects can be unlocked and upgraded using Titan Bloods. The gun, Exagryph, has an aspect called the Aspect of Lucifer. Using this aspect changes the bullets into a continuously firing laser beam, and changes the bomb into a small orb of Hellfire that deals a small amount of damage each second to an area, and if caused to explode deals a massive amount of damage to that area. Each aspect of the weapons change the default attack animations, timing, damage, and even behavior of the weapon.

Another facet of leveling up involves Keys and Darkness. Nyx has given you a Mirror of Night, and you can use Keys to progressively unlock more stat modifiers, and invest Darkness to increase the stat buffs. A buff called Shadow Presence allows you to deal +15% damage to enemies at full health. You can increase this buff 5 times, giving you +75% damage. Other buffs alter the chances of receiving legendary or duo boons, change your maximum starting health, or alter how the bloodstones behave.

Manage Heat Level

When you first defeat a boss with a weapon, you will receive that boss's unique reward: for defeating the Furies at the beginning and Hades at the end, you get Titan Blood, for defeating the hydra you get a diamond, and for defeating Theseus and Asterius you get an Ambrosia. If you attempt another escape on the same heat level, you will receive a reward of darkness instead. In order to unlock the unique rewards again, you need to first complete an escape attempt on the current heat level (from the Furies all the way to Hades) with that weapon, then increase the heat level. Heat is managed through the Pact of Punishment. After defeating Hades the first time, this will unlock. Before leaving the House of Hades on an escape attempt, you can choose from different conditions on the Pact of Punishment. Each condition increases the heat level by some amount. The Hard Labor condition increases enemy damage by 20%, and increases the heat level by 1 for each rank of Hard Labor. It comes in 5 ranks, so you can increase the heat level to 5 just by increasing the rank of Hard Labor. Or you might choose Benefits Package, which gives armored foes one perk for each rank. The first rank increases heat by 2, and the second rank increases heat by 3. There are 13 other conditions that you can choose from. One point to keep in mind is that you can only collect bounties on the lowest heat level which you have not yet completed. So if you have completed heat level 2 with the bow, if you set your heat level to 4, you will only collect the reward for heat level 3.

To belabor this point a little, this matters because you only get the unique reward on the first victory over the boss per weapon per heat level. If you want to get another Ambrosia, for example, there are only two other ways to get it. One is by completing a minor prophey that has an Ambrosia as a reward. As you play the game, you will quickly reach a limit, as you will already have completed the easier Minor Prophesies, and only the more difficult ones will remain. Eventually, you might have no Minor Prophesies left to complete. The other is by completing many escape attempts and farming Gems, then progressively trading Gems for Keys, Keys for Nectars, Nectars for Diamonds and Diamonds for Ambrosias. To get one Ambrosia in this way requires 1000 Gems! Since you can exchange one Ambrosia for one Titan Blood, one Titan Blood also costs 1000 Gems. So if you are not willing to increase the heat level, you need to get yourself ready for a lot of grinding to get the necessary gems to increase your relationship with an NPC, or to get that next aspect of a weapon.

Resources

There are a number of different resources.
  • Zagreus's health: Self-explanatory.

Conflicts

There are a number of conflicts in Hades. In terms of story and gameplay, there is the conflict between Zagreus and his father, and by extension the minions that you face throughout your escape attempt. Your father does not wish you to escape, and the minions have been tasked with stopping you.

There are also conflicts between Olympus and the underworld. There are conflicts between the Olympic gods themselves. The former have already been discussed in the story section. Regarding the latter, these appear when you enter a room with boons from two gods. You will have to choose one of them, and then you will have to clear the spawned in enemies to receive the second reward. During the encounter, you will also face abilities from the god that you spurned - waves that seek you out in the case of Poseidon, or an AOE that makes enemies inside it temporarilly invincible in the case of Athena.

There are conflicting choices facing you regarding the encounter rewards. Do you take the Centaur Heart, which increases your health or do you take the Obols for a purchase at Charon's Well later on? The choice depends on your current boons and Daedalus upgrades, as well as how you like to play.

In more detail for the boon rewards, the choices will also depend on the above factors. You will have to choose whether to focus on increasing your critical chance (Deadly Strike from Artemis) or firing a seeking arrow when you cast, attack or special (Support Fire from Artemis), or gaining extra bloodstones (Fully Loaded from Artemis).

There are further conflicts regarding when you can use companion keepsakes. Thanatos, Achilles, Maegara, and Dusa's companions may not be used against Hades, since they are essentially his employees. Later on this restriction is lifted, though. Maegara's companion may also not be used in the Fury boss battle.

Regarding the boons from the gods, there are a large number of restrictions and limitations. To start with, as mentioned before, you can only equip one boon for each of your 5 abilities. There are further restrictions regarding weapon aspects and boons. Normally, your cast throws out a bloodstone, but if you have the Aspect of Beowulf equipped for your shield, you load the bloodstone into your shield, and when you do your shield bash, the attack transforms into the "Dragon Rush," and further gains any buffs that would normally be applied to your cast. Any cast boons that drastically alter the behavior of the cast cannot be combined with this Aspect, such as Artemis's True Shot or Demeter's Crystal Beam. Hades deals with these boon/aspect conflicts by simply preventing incompatible boons from spawning in, so you are never presented with a false choice.

Hades deals with Daedelus weapon upgrades in the same manner. The Cruel Thrust upgrade for the sword cannot be combined with the Aspect of Arthur, but you will never see that upgrade appear while you are using that aspect. Besides conflicts between aspects and Daedelus upgrades, there are conflicts between Daedelus upgrades. So, the Flurry Slash upgrade, which transforms your attacks into all slashes for the sword, cannot be combined with Cruel Thrust, which gives bonus damage to thrusts.

Boundaries

There are a number of different boundary conditions in Hades. You can only use one weapon per escape attempt. After defeating each boss, you will enter a special room where you can:
  • replenish your health at a fountain
  • sell up to three boons to receive Obols
  • change your keepsake
  • buy items from Charon's well using Obols

You can also only use one companion keepsake per escape attempt. You are allowed change your regular keepsake, as long as you have not already used it before in that escape attempt.

You cannot give Nectars or Ambrosias to NPC's once you have maxed out their heart meter.

Since there are a limited number of Pact of Punishment conditions, you can only increase the heat level up to 63, although you can only collect the unique boss rewards up to heat level 20.

Despite the conflicts and limitations mentioned so far, there is a huge host of different possibilities regarding builds. Each escape attempt features one aspect of one weapon, and since there are 6 weapons with 4 aspects each, that yields 24 different ways to play. When you add in the gods' basic boons (I mean the ones for Attack, Special, Dash, etc), you can easily calculate that there are 8 gods each with a boon there, and there are no restrictions that your attack boon imposes on your special or that your call boon imposes on your dash etc, so there are 8 X 8 X 8 X 8 X 8, or 32,768 possible combinations. Combining this with the different weapons and aspects gives you 786,432 possibilities. Then there are the duo boons, the second and third tier boons dependent on different combinations of basic boons, and the boons that are not tied to a specific ability, such Demeter's Frozen Touch, which inflicts chill on enemies around you after you take damage. These latter boons can be obtained no matter what other boons you have.

And, we have not touched on Hermes's or Chaos's boons, as these do not take up an ability slot. So, while there is a definite limit on how boons, weapons, and aspects may be combined, there is a large state space for the player to explore.

Outcomes

There is one main outcome for the game, with several smaller ones for each of the side quests. The main outcome has already been described in the story section and hints have been dropped regarding the side quests there as well.

Dynamic Elements


The dynamic friction pattern appears in a number of different forms. The unlocking of different buffs in the Mirror of Night is one example. Unlocking more and more buffs requires larger numbers of keys, and several of the buffs require progressively larger amounts of darkness to upgrade.

The dynamic friction pattern also works together with the static friction pattern in the Mirror of Night. Many of the buffs do not require larger amounts of darkness, but simply the same static payment each time.

The static friction pattern appears by itself in the house customization elements. These cost a set amount of gems and although they do allow you to customize the look of the house, serve mainly as drains for gems.


The slow cycle makes several appearances in Hades. The medium large slow cycle is making a particular escape attempt. You start in roughly the same state each time, and by the end you have gathered a host of different boons and power-ups creating a custom build in order to defeat your father and see your mother. This resets when you die, which happens whether you are victorious or not.

A smaller slow cycle appears in each area of the game, where you first face smaller groups of enemies, before gradually climaxing with a boss battle. Both these scales of slow cycle also incorporate the escalating challenge pattern, as the difficulty increases as you progress through each area, and also as you approach the final boss.

The largest instance of the slow cycle and escalating challenge appears when you have unlocked the Pact of Punishment. As you push yourself to get more unique rewards, you will play through the game multiple times with different weapons and under different heat levels, gradually increasing the heat level as you master different strategies at the lower difficulty levels.

The playstyle reinforcement pattern appears in numerous ways. This frequently appears with the worker placement pattern. One example of the playstyle reinforcement is in the weapons and the Mirror of Night upgrades. Each buff has two variations, and you may choose the one which better matches how you like to play. Personally, I'm not great at avoiding damage, so I usually have the Thick Skin buff and the Death Defiance buff, which increase your health and the number of lives you have, respectively.

Another instance is in the weapon and aspect choices. In the early stages of the game, you only have the sword, but once I unlocked the spear, it became one of my favorites. Now that I've put much more time in the game, I often use the Aspect of Zeus on the shield, or the Aspect of Talos on the cestus. I'm sure other players have other weapons and other aspects that they prefer.

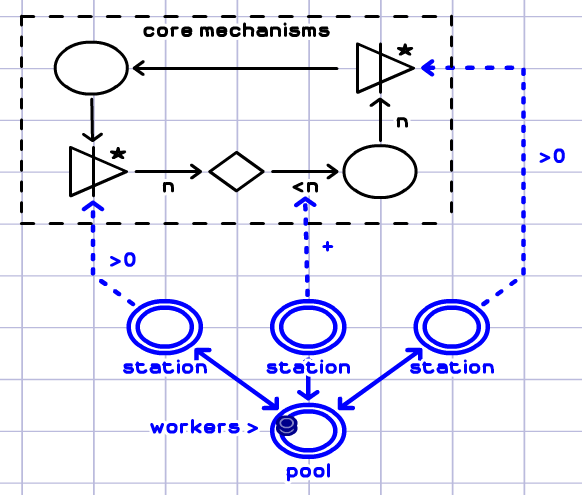
The reason I say this is worker placement is because in between escape attempts you are allowed to switch weapons and companion keepsakes, without consuming resources. You simply move your choice from one to another.

The static engine is used throughout Hades, primarily as the reward generator. You are guaranteed to get some reward after completing an encounter, and you have some influence over what the reward is, since you can choose different rooms as you complete an escape attempt.


The converter engine appears mostly in the trader, where you can trade gems for keys, keys for nectars...you remember how it goes. This is not an example of the trade pattern, because of the limited options for purchases.


The stopping mechanism appears throughout Hades. In terms of combat gameplay, there is a limit on the number of times you may dodge in a row. This prevents the player from zipping around the rooms basically immune to damage.

The requirement to charge up your god gauge in order to use your call is another instance of the stopping mechanism. The calls are quite powerful abilities, and without the god gauge it would be quite easy to spam them and breeze through otherwise difficult encounters.

Similarly, the restrictions on the uses of companion keepsakes function as stopping mechanisms. Sisyphus's companion, Shady, drops a rock on enemies that deals 1000 points of damage in an area, and also spawns in a care package of health, Obols and Darkness. Since this can only be used once per combat encounter and a maximum of 5 times per escape attempt, the player is prevented from abusing it.

The stopping mechanism also appears in the NPC interactions throughout the game. As mentioned before, you can only interact once with an NPC in the House of Hades, and you can only give one gift to that NPC or god per escape attempt. While this is an instance of the stopping mechanism, the brilliant thing is that it actually encourages you to make another escape attempt in order to progress the story or deepen your relationship.

Conclusion

At the time of writing this, I have spent close to one hundred hours with Hades. The controls are smooth, responsive, and the combat feels great - you never feel totally over matched, but you never really feel invincible either.
Throughout over 100 escape attempts, I never came across a build that I felt broke the game, although I have found many builds that I'd like to try to recreate.
As someone who is quite familar with Greek mythology, I had a strong intuition for where the story was going early on, but I thoroughly enjoyed speaking with the characters and the gods. They are voice-acted wonderfully, and the dialogues do not overstay their welcome. And the way that players are encouraged to make just one more escape attempt in order to progress the story or further a relationship is brillant.
Overall, the design of the game is solid, and the mechanics work together to produce a thoroughly enjoyable experience time after time, play after play.
God Boon
Aphrodite
Attack Special Cast Dash Call
Title Heartbreak Strike Heartbreak Flourish Crush Shot Passion Dash Aphrodite's Aid
Description Attack deals more damage and inflicts Weak (enemies deal less damage) Special deals more damage and inflicts Weak (enemies deal less damage) Cast is a wide and short blast and inflicts Weak Inflicts Weak where you end up Fire a seeking project that inflicts Charm (enemy fights for you for a short time)
Other
Title Different League Life Affirmation Wave of Despair Dying Lament Empty Inside
Description Resist damage from nearby foes' attacks Any life increase or healing chamber rewards are worth more When you take damage, inflict Weak on nearby foes When foes are slain, they inflict Weak on nearby foes Your Weak effects have a longer duration
Title Cold Embrace Sweet Surrender Broken Resolve Unhealthy Fixation Blown Kiss
Description Your cast crystal fires its beam directly at you for 4 seconds Weak-afflicted foes are also more susceptible to damage Your Weak effects are more potent Your Weak effects also have a chance to Charm foes Your cast shoots farther and is stronger against undamaged foes
Title Smoldering Air Sweat Nectar Parting Shot Heart Rend Curse of Longing
Description Your call charges up automatically, but is capped at 25% Any Poms of Power you find are more effective You cast gains any bonuses you have for striking foes from behind Your Critical effects deal even more damage against Weak foes Your Doom effects continuously strike foes
Title Low Tolerance


Description Your hangover effects stack even more times against Weak foes


Daedalus Upgrade Infernal Arm
Stygius Varatha Aegis Coronacht Malphon Exagraph
N/A 4 keys 3 keys 1 key 8 keys 8 keys
Title Breaching Slash Extending Jab Dread Flight Twin Shot Breaching Cross Flurry Fire
Description Your armor attacks deal +300% Your Attack has more range and deals +40% damage to distant foes. Your Special can strike up to 4 additional foes before returning. Your Attack fires 2 shots side-by-side, but has reduced range. Your Dash-Strike pierces foes and deals +900% damage to Armor Your Attack is faster and more accurate; gain +6 ammo capacity.
Title Cruel Thrust Chain Skewer Sudden Rush Sniper Shot Rolling Knuckle Ricochet Fire
Description Your thrust deals +200% damage and has +40% Critical chance Your Special bounces to up to 7 foes, dealing +30% damage for each. Your Bull Rush charges much faster. Your Attack deals +200% damage to distant foes. Your Dash-Strike deals +60% damage; added to Attack sequence. Your attack bounces to +1 other foe
Title Cursed Slash Breaching Skewer Pulverizing Blow Explosive Shot Long Knuckle Spread Fire
Description Your Attack restores 2 Health, but you have -60% Health. Your Special deals +400% damage to Armor. Your Attack hits twice, but does not knock foes away. Your Attack deals +300% damage in an area, but charges slower. Your Attack has more range and deals +10% damage Your Attack becomes a short spread that deals 40 base damage; lose -6 ammo capacity.
Title Dash Nova Vicious Skewer Dashing Wallop Flurry Shot Draining Cutter Explosive Fire
Description Your Special makes you lunge ahead, then become Sturdy for 0.8 Sec. Your Special deals +50% damage; +50% Critical chance on recovery. Your Dash Attack deals +50% damage in a larger area. Hold Attack to shoot rapidly, but you cannot Power Shot. Whenever your Special slays foes, restore 2% life Your Attack deals damage in an area and briefly slows foes.
Title Double Edge Exploding Launcher Explosive Return Piercing Volley Concentrated Knuckle Delta Chamber
Description Your Dash-Strike hits twice and deals +20% damage. Your Special is replaced with a shot that deals 50 damage in an area. Your Special deals 50 damage to nearby foes when you catch it. Your Special pierces foes and deals +400% damage to Armor. Your Attack deals +5 base damage for each uninterrupted hit to a foe. Your Attack is a 3-round burst; you never have to Reload.
Title Double Nova Massive Spin Minotaur Rush Perfect Shot Explosive Upper Piercing Fire
Description Your Special hits twice but no longer knocks foes away. Your Spin Attack deals +125% damage and hits a larger area. Your Bull Rush gains a Power Rush that does +500% damage. Your Power Shot is easier to execute and deals +150% damage. Your Dash-Upper deals +100% damage in an area Your Attack pierces foes and deals +50% damage to Armor.
Title Flurry Slash Quick Spin Breaching Rush Relentless Volley Flying Cutter Triple Bomb
Description Hold Attack to strike rapidly, dealing 25 base damage per hit. Your Spin Attack charges and recovers much faster. Your Bull Rush deals +400% damage to Armor. Your Special shoots +4 shots. Hold Special for longer range and up to +100% base damage You can use your Special 3 times in rapid succession.
Title Hoarding Slash Flurry Jab Charged Shot Triple Shot Rush Kick Rocket Bomb
Description Your Attack deals bonus damage equal to 5% of your current Obols. Hold Attack to strike rapidly, but you cannot Spin Attack. Your Bull Rush instead fires a piercing shot that deals 80 base damage. Your Attack fires 3 shots in a spread pattern. Your Special becomes an advancing kick that also deals 40 base damage twice Your Special is replaced with a rocket that deals 80 base damage.
Title Piercing Wave Charged Skewer Charged Flight Charged Volley Quake Cutter Targeting System
Description Your Attack fires a wave that pierces foes, dealing 30 damage. Hold Special to charge your skewer for up to +200% base damage. Hold Special to charge your throw for up to +200% base damage. Hold Special for up to 350% base damage; minimum range is reduced. After using your Special, deal 90 damage in an area where you land Foes targeted by your Special move slower and take +30% damage.
Title Shadow Slash Serrated Point Empowering Flight Chain Shot Kinetic Launcher Hazard Bomb
Description Your Attack deals +200% damage when striking foes from behind Your Dash-Strike hits 3 times, but your dash has -25% range. After your Special hits, your next 2 Attacks deal +80% damage. Your Attack bounces to up to 3 foes, dealing +15% damage for each. Your Special becomes a charged ranged attack that deals 50 base damage. Your Special deals +300% base damage in a large area, but can hurt you.
Title Super Nova Flaring Spin Dashing Flight Point-Blank Shot Heavy Knuckle Cluster Bomb
Description Your Special hits a wider area and deals +20% damage. Charging your Spin Attack makes you Sturdy and pulse 40 damage. While you Dash, your Special is faster and deals +200% damage. Your Attack deals +150% damage to nearby foes. Your Attack becomes a slower 3-hit sequence, each deals 40 base damage. Your Special fires a spread of 5 bombs, but each deals -30% damage.
Title World Splitter Triple Jab Ferocious Guard Concentrated Volley Colossus Knuckle Seeking Fire
Description Your attack is replaced with a big chop that deals 90 base damage Your Attack strikes 3 times in a spread pattern. After blocking a foe, gain +20% damage and move speed for 10 Sec. Your Special deals +3 base damage for each consecutive hit to a foe. While using your Attack or Special, you are Sturdy Your Attack seeks the nearest foe and deals +10% damage.
Title Greater Consecration Winged Serpent Unyielding Defense Repulse Shot Rending Claws Concentrated Beam
Description Your Holy Excalibur aura is +45% larger and makes foes +10% slower Your Frost Fair Blade Spin Attack travels for +80% longer. After using your Naegling's Board Cast, you are Sturdy for 3 Sec. Your Celestial Sharanga Attack creates a Blast Wave around you. Maim-afflicted foes take +25% damage and move 30% slower Your Igneus Eden Attack damage to a foe ramps up +100% faster.
Title


Flash Fire
Description


Your Igneus Eden Attack starts firing and fires +50% faster with +15% range.
Title


Triple Beam
Description


Your Igneus Eden Attack fires 3 beams in a spread pattern.
Title


Eternal Chamber
Description


Your Igneus Eden has ∞ ammo, but its damage no longer ramps.
Title


Greater Inferno
Description


Your Igneus Eden Hellfire radiates +250% damage in a larger area.

Sunday, February 28, 2021

Mad Max Game Analysis

You can find the video version of this analysis here.

Overview

Mad Max is an open world action driving/brawler hybrid based in the Mad Max universe created by George Miller in 1979. The Swedish company Avalanche Studios started development from 2012 and it was published by Warner Bros in 2015.

Formal Elements

Players

You play as the eponymous Max, a former Australian police officer who lost his wife and children to a violent gang attack in a future Australia where society's rules are crumbling. Although undoubtedly inspired by earlier figures like Clint Eastwood's Man with No Name, Max has been a huge influence on later lone anti-hero figures in cinema: Riddick and The Mariner from Waterworld being two examples.
Max begins the game in a similar situation to the film, Mad Max 2: He is driving his famous Interceptor car across the wasteland searching for enough fuel to cross the Plains of Silence. He is suddenly attacked by the main villain, Scabrous Scrotus, a son of the villain from the movie Mad Max: Fury Road, Immortan Joe. Although it appears that Max kills Scrotus, Scrotus' followers take Max's car and leave him for dead.
Following the characterization in Mad Max: Fury Road, Max has visions and has been driven over the edge by a combination of his traumatic experiences and the isolation involved in post-apocalyptic life.
Max is the only playable character in the game, and it is primarily a single-player experience, although there are some racing activities which can be completed together with friends online.

Rules

Combat and Movement

The combat of Mad Max has been heavily inspired by the Batman Arkham series developed by Rocksteady Studios. Similar to that series, Max can pummel wastelanders using his fists, counter their regular attacks, dodge their unblockable attacks, and use his shotgun to deal massive damage quickly. The shotgun replaces Batman's larger arsenal of tools such as the batclaw, batarang, and others.
As you counter, finish, and attack enemies successfully, you build up a combo counter that can send Max into a "Fury" mode, where your attacks deal more damage. Failing a counter or taking damage resets the combo counter. Like in the Arkham series, enemies come in a decent variety that force the player to use certain strategies against them. Your typical grunts can be wailed on to your heart's content, but shiv-wielders are fast and will dodge your attacks, forcing you to wait for their attack in order to counter them. Brawlers will block your attacks, and attack in heavy-hitting two punch combos or in unblockable grapples that pin you for their friends to take advantage of. Enemies with a larger weapon such as a club, axe, or machete attack more rarely than the other types, and can sometimes be tricked into taking out some of their friends with their wild swings. These weapons can be picked up and used until they break, or dropped at any time. Using your shotgun will automatically drop them. Shield carrying enemies have a number of unblockable attacks, and their shield must be destroyed before you can do damage to them. One last interesting enemy type is the warcrier, who is suspended above the battle and beats on a drum while exhorting the other enemies to attack you. This fills a meter that makes them "inspired," dealing more damage.
Where Mad Max departs from Batman is in the embrace of certain timing based elements and in lethality. For example, in the Batman Arkham series, as long as the distance and timing are within certain limits, you can counter any enemy. In Mad Max, however, Max does not have Batman's athletic training and will not zip around the combat arena, so you must be more aware of the distance between you and the enemy you wish to counter, and you must also take into account timing. You can trigger some special abilities if you match the timing of your counter "perfectly." On the other hand, you can take a small amount of damage but still block the attack if you bungle the timing. This is similar to the "active reload" feature of the Gears of War games, and adds a further element of challenge and mastery to the combat.
The shotgun Max carries allows him to quickly kill a single unarmored enemy, or to eliminate an enemy in an unreachable position. However, ammo is quite rare, and you can only hold a small number of shells at a time. The second element of lethality is the shivs that Max can pick up from knife wielding enemies and around bases. These can be used to finish off a stunned or downed enemy.
Another departure, in this case negative, is in the animation system itself. In the Batman Arkham series, the enemies' animations are all locked to Batman's state. So, if Batman is in the middle of a punishing finisher move, no enemies can attack you. This creates a feeling of reliability while in combat, because you can always count on being "safe" when you enter an attack or move with a long animation time. In Mad Max, they made the same mistake as CD Projekt Red did in The Witcher III: Wild Hunt: they try to combine the cinematic feeling of the Arkham series with the more realistic enemy attack timing of Dark Souls. This means that during many of your inescapable animations, you can still be attacked by enemies. During my 40+ hours with the game, I found few reliable animations that would 100% of the time prevent enemies from attacking me. The Wall Slam or Wall Finisher animations were most reliable, but even these sometimes do not block enemies. I'm not sure if this was deliberate, in order to create a feeling of unease in the player, or if this is simply the animation systems not communicating effectively. While you get used to this uncertainty, it detracted from my enjoyment of the combat.
The game features an autosave system that prevents you from losing too much progress if you die. For example, while trying to clear an enemy base, you might face between 3-5 groups of enemies, each with different numbers and types - one group of two grunts, a knife-fighter, and 3 brawlers, another group of 2 shield-carriers, a brawler, and 5 grunts, etc. If you die on any group, the previous groups you've faced will remain defeated, and any scrap, objectives, or collectibles you've picked up will remain cleared. You will respawn just outside the base and have to make your way back to the group you died on.
Outside of combat, Max can walk and run around, jump and climb on different structural elements. Due to the size and emptiness of the game world, it is best traversed using a vehicle. The different scavenging locations and bases often feature ladders, zip-lines, and climbable elements marked in strong contrastive colors to signal that they are climbable. If it is not marked in this color, Max's extremely low jump probably will not clear it.
On to vehicle movement and combat. The vehicles interact with the world in mostly realistic ways. The tires grip asphalt and slide through the sand, rocks bump you into the air. By default there is roll assist, which mostly prevents the cars from flipping over, although I did manage to get the car stuck on its side once or twice. As you drive, the fuel tank will slowly drain, but this can be refilled at a base if you have the appropriate upgrade, or you can collect gas canisters at enemy bases or other scavenging spots. You can modify your main car in a large number of ways. There are several car bodies to find throughout the game, and these change the overall look of the car, but then there are the performance modifiers. You can install different upgraded versions of a V6 or eventually V8 engine, which influences your top speed, acceleration and handling; armor, which protects you from enemy cars and increases the weight (slowing the car down and reducing acceleration and handling), different rams, suspension systems and exhaust, different tires for asphalt or sand, rims that damage cars you grind against, and lots more. For weapons, there is a harpoon, used to latch onto structures and vehicles to rip away armor, doors, or wheels; a thunderpoon, which is an explosive rocket weapon, a sniper rifle for taking out snipers in towers, and flamethrowers mounted on the side of your car to damage enemies next to you. There are also cosmetic changes, such color, decals and both front and rear ornaments.
Driving around the map is a real pleasure. If you reach max speed, you can hear the wind whooshing by, and car generates wind particle effects as you barrel down the mostly abandoned highways. The engine revs up, and you get a bit of tunnel vision as well from the camera changing the field of view. At the beginning of the game, your car, the Magnum Opus, will be quite weak, and you will have to disengage from enemies more often than you engage them. At a certain point, the tables are turned and you will become something of a hunter, actively taking out groups of roving bandits or convoys. You can ram into cars or enemies on foot, and you'll get a damage boost if you use your nitro, or you could use your shotgun, harpoon, and thunderpoon. Sometimes cars with loads of extra enemies will pull up besides you and the enemies will leap over to your car and try to attack you as you drive. You can even ricochet between cars on either side of you as you smash their doors and remove their armor plating.
On the subject of damage, once your car reaches zero "health," you will have 5 seconds to get out before it explodes. If you don't make it out, your car will explode, taking you out with it. If you do, you have a few options. If you are driving your Magnum Opus, your BlackFinger Chumbucket will begin to repair it. You'll have to wait until the car's "health" reaches halfway before you can hop in and continue. If you are driving another car, you'll have the option of spending a certain amount of scrap to repair it instantly, as Chumbucket is only available in the Magnum Opus. If you die outside of an enemy base, you will be returned to the nearest friendly base.
Returning to driving other cars, it is possible to drive any enemy car, provided you can kill the driver or force him to exit the car. You can then get in and drive it around the world, or drive it back to a friendly base. Doing so will add the car to your garage collection, if you don't already have that car. Once added, you can pick that car from any friendly base any time you wish to venture out into the wasteland. You will be able to fast travel, but doing so automatically switches to your Magnum Opus. One benefit from using an enemy vehicle is this provides a faction-based disguise, unless you get too close to an enemy vehicle. This allows you to avoid conflict with enemy patrols of that faction, and also to drive much closer to an enemy base before they realize what's up.
One final subject that covers both vehicle and melee combat is fire. Some cars are equipped with gasburners or flamethrowers that will temporarily set your car on fire, dealing damage for a few seconds. The same can happen in different areas in the bases. There are often areas that are blocked off by a constant stream of burning gas, and if you make contact with it it will set Max on fire for a few seconds and deal massive amounts of damage. You can use this same principle on enemies, and either knock them into the fire or lure them into it.

Base Development

As you play the game, you will encounter a number of different bases led by friendly factions. You can perform a certain number of missions for them that will unlock special benefits for you, and you can also explore the map to find specific items which can be used in base development. For example, you might need four special items in order to build a water collection system. As water and food allow you to refill your health bar, having this system refills your water canteen automatically when you visit the base. You can travel to the locations marked on your map, pick up the items, and return to the base to build the system. There is a time limit on the frequency of refilling, however, so you can only refill your canteen about every 30 minutes.
Besides a water collection system, there are many others. For example, you can build a maggot farm to refill your health automatically, a clean up crew to collect any scrap from vehicles you destroy in the region, and a oil reserve to refill the fuel on your car.
Combat is impossible in friendly areas. These friendly bases are filled with NPCs who are immune to your attacks. Every other area of the game is considered hostile.

Inventory

Mad Max has an extremely simple inventory system. You always carry your shotgun, and you can pick up a limited number of shells and shivs to use in combat. Any scrap or ammo for your car weapons is automatically transferred, although like your shotgun, you have limited slots for your car weapons' ammo and cannot store any extra. There is no item management or even inventory screen.

Region Management

Each friendly base controls a region divided into several territories. Each territory has a number of minefields, enemy camps, convoys, sniper towers, totems and race locations. Completing races will unlock new cars for your base, while clearing the other challenges will reduce the threat in the region. Reducing the threat makes it safer to travel through the region, with fewer enemies spawned in as you drive around. Reducing the threat is also critical for unlocking certain upgrades, and advancing the story in some places.

Procedures

Complete a mission

These are relatively simple in structure, and usually involve killing a particular enemy or destroying a camp, or going to a location and finding an item. You might have to complete a race or speak with an NPC as part of the mission, but these serve to add spice. All missions advance the main story of Max's quest to get his V8 back, and eventually cross the plains of silence.

Scavenge

Scrap is critical for upgrading the bases and the Magnum Opus. You will collect a large amount of scrap by clearing bases, destroying enemy vehicles, and in the early game, by finding locations marked as scrap sites.

Eliminate a convoy

Enemy convoys are large groups of cars with one main vehicle being protected. These patrol set routes, and can be really challenging to take out, especially in the early when your Magnum Opus does not have much armor or offensive ability. Once a convoy has been eliminated, you can pick up an ornamental object for your car, and the threat level in the region will be reduced.

Clear an enemy camp

Camps come in several varieties. The main enemy camp in any region will house a "Top Dog," which will be a reskinned version of Scabrous Scrotus himself. They all fight in almost the same way, have the same animations, and can be tackled with almost the same strategy: bait them into charging, dodge, then wail. Rinse and repeat. There is very little variety here.
Another camp type is an extended brawl. You will face a number of groups from Stank Gum's Legion, and you just have to kill all of them. Two other camps are oil pump camps, and transfer tank camps. The objective of these is to destroy either the tanks or the pumps. You will also find a number of scrap items, ammo, food, water, and base parts for you to collect, and Scabrous insignia for you to destroy. These are optional, but with the exception of the insignia, all benefit you.
Camps have a number of navigational challenges or puzzles associated with them. You might have to lower a bridge whose winch is on the oppsite side, or you might have to locate the trigger to turn off a gas flame that is blocking your path. These serve to break up the combat challenges and add a bit of variety.
As a prelude to actually clearing the base, you can often speak with an NPC placed outside it who will give you extra information, such as defenses, what to expect inside, and secret ways in. Also, the bases often have different types of defenses: snipers, towers that launch grenades, flame throwers that block the entrance, etc. Similarly to the warcrier's effects on enemies, spending a long time with these defenses aware of you will increase a defense meter. Once filled, the defenses will become supercharged, dealing more damage and more actively attacking you.
As you continue playing, you will be dependent on these camps. After you clear them, friendly NPCs move in and take over, much like in the cleared villages in The Witcher III. Every 20-30 minutes, they will gather scrap that is deposited in your account for you to use however you want. Near the endgame, you will receive around 200-400 scrap at a time.

Clear a mine field

Mine fields are both interesting and somewhat annoying in this game. Unlike most games with mine clearing, the mines are actually invisible until detected. You need to use a special vehicle, Chumbucket's buggy, in order to detect them. The buggy has a dog, who you encounter and rescue from Chumbucket at the beginning of the game. The dog will bark and face the direction of the nearest mine, and when you get close enough it will be revealed for you to disarm. Although novel, there are two problems with the implementation of this mechanic. First, you cannot fast travel with any car except the Magnum Opus, so if you fast travel with the buggy from anywhere to the nearest fast travel option, you will automatically switch to the Magnum Opus, defeating the purpose of using the buggy in the first place. The second is the sheer number of minefields. Most territories have two minefields, and each minefield has between 2-3 mines. 14 territories times 2 minefields times 3 mines is 84 mines! To summarize, you'll have to drive around in a very weak and exposed vehicle to the minefield, assuming you have already located it, then slowly putter around listening to your dog bark and watching which way he is facing until a mine is revealed. While this is interesting the first few times, 28 mine fields is a bit much.

Complete a race

As mentioned before, sometimes completing a race will be necessary in order to progress the story. There are a few different kinds. One is simply to reach the finish line before anyone else, while another is a checkpoint based race: there are a number of lines of barrels set across the race track at different points, and at each line you must smash into one barrel before continuing.

Reveal a region

There are 11 air balloons scattered over the world map. Once accessed, these function as fast travel locations. Very often these will be guarded, and sometimes you will have to make the air balloon functional again. For instance, once or twice you will find one that needs to be fueled up, and there will be no fuel canister in the area, so you will have to use a spare from your car if you have one, or you will have to go and find one then return. Once up in the air, you can use your binoculars to reveal different locations on the map, and to reveal the name of the region as a whole.

Level up

Mad Max has a rather unique leveling system. Max has ten abilities, each with ten levels. In order to level up his abilities, you need to complete challenges. A challenge is basically set up as a condition: for example, collect 45000 total scrap in your playthrough, or defeat 10 Scrotus vehicles. Some of these, by their nature, are repeatable, like the second one. Others, such as completing all the base projects for all bases or for one particular base, can only be completed once. Each time you complete a challenge, you are rewarded with a Griffa point and an increase to your legend level as well. It seems that your legend level controls several aspects of the game: you can only get access to some upgrades for your car after reaching a set legend level, for example.
Griffa, it is implied, is one of Max's hallucinations. In order to level up your abilities, you must travel to one of Griffa's locations, which are marked on the map. There, he will engage in some dialogue, and then you may upgrade your abilities. These include increasing your health bar, receiving bonus water from water collection sites, increasing the amount of health you gain by eating food, gaining extra scrap when you collect it, using fuel more efficiently, and several combat related abilities, like increasing your damage with a melee weapon or making melee weapons last longer before they break.

Manage a base

In keeping with the Mad Max ethos, there is not much for you to do in managing a base. Unlike Metal Gear Solid V, you will not assign staff to different departments, nor will you need to make sure income is sufficient. All you need to do is collect the appropriate parts out in the wasteland, bring them back when you have them all, and build the project in the base. Besides the in-game benefits of doing so, it feels really satisfying to see each base progress from an absolute shit-hole to...well, not paradise, but a less shittier hole, at least.

Upgrade the Magnum Opus

At the beginning of the game, it will be quite basic and weak, but you can unlock rams, armor plating, new weapons, nitro boosters, and many more. Most of these just require scrap, but often have a game wide condition as well. This could be completing a story mission, or reducing the threat level in region below a certain threshold.

Weather a storm

Similarly to the massive sandstorm in Mad Max: Fury Road, sandstorms will frequently appear in different areas of the map. It is sometimes possible to evade them by driving outside their range, or even more simply by seeking shelter in a friendly base. These storms are dramatic and deadly. The sky darkens, lightening flashes down across the landscape, the normally quite soundscape is replaced by mad howling and blowing, you can barely see anything, and huge pieces of debris are whipped around which can lay Max out and kill him, and which (thankfully) only slightly damage the car.

Resources

There are a number of different resources.
  • Max's health: Self-explanatory.
  • Max's canteen: Holds a limited amount of water. You can collect this from water collection devices spread around bases and scrap locations. You can drink from this to restore some of Max's health.
  • Max's stats: Max has a number of abilities and stats that can be upgraded in different ways. Similar to the way that the Magnum Opus can be upgraded in the garage at any time, Max's gloves, jacket, shotgun, and fighting special abilities can be upgraded and unlocked using scrap. As discussed above, by completing challenges you get Griffa tokens, which you can take to Griffa's location and upgrade his health, etc.
  • Max's shotgun ammo: Really scarce, and useful in particular circumstances.
  • Max's Shiv ammo: Dito.
  • Car's health: Chumbucket will repair this automatically whenever get out and explore. Your car cannot be repeated while it is in motion.
  • Car's stats: Discussed above.
  • Car weapon ammo: Can be found in bases, and also replenished if you have the armory upgrades in a friendly base.
  • Region threat level: This is controlled by the number of threats in the region.
  • Base Upgrades: Discussed above.

Conflicts

The main conflicts in terms of game play are how you customize your car. There are a large number of trade-offs. Just as a few examples, let's say you want to build some kind of speed demon, so you max out the engine and exhaust, remove all the armor plating, and front ram. This gives you a light, fast car that will take damage very easily and probably not survive long in a tough fight. On the other hand, maxing out the speed also has a slight negative effect on the handling, so the greater your max speed and acceleration, the more difficult it will be to maintain a good course with such a car.

You could of course go the opposite way, maxing out armor, equipping the heaviest ram. This will make your car much slower, but more able to withstand and to deal damage. You can still have a powerful engine, but due to the weight of the armor and ram, it will be less effective.

For the story, of course the conflict between Max and the enemies is front and center most of the time. He wants his V8 engine so he can continue his insane plan to cross the non-existent Plains of Silence. But, there are a number of lesser conflicts. For example, whenever you level up, Griffa's dialogue speaks about how Max still has his humanity and his desire for friends and family, but Max repeatedly denies this, even as you the player make Max improve all the friendly bases and complete tasks to make their lives better. As the story progresses, it becomes clear to Chumbucket that Max sees him as a means to an end, and plans to install two large gas tanks in the back, leaving Chumbucket no place of his own. This leads to a short-lived conflict between the two of them.

Although never acted upon in the game, there are also conflicts between the different friendly bases. As you wander around them, the NPCs can be heard to say things like "I guess we're now trading with those assholes of Jeet's. I can't wait till we raid one of their convoys" or similar hostile comments.

One final conflict is between Max's goal and Hope. Hope is a slave/concubine that Max encounters in one of the friendly bases early on, and later takes on more significance as Max does a number of missions for her to rescue her daughter, Glory. Max initially denies his own humanity and attraction to her, but eventually risks his own life and his goal to help her.

Boundaries

The world map is surrounded by The Big Nothing, which takes the form of endless dunes and dramatic canyons (presumably once undersea valleys). You can enter this area for short distances but eventually you'll be forced to turn around.
As mentioned before, there are strict limits on inventory. You can only hold so much ammo for your shotgun and your car weapons, and the same goes for water. You can never carry food around: once found, you must either leave it, or eat it immediately.
There are also some limitations on car types. These are restricted to four-wheel vehicles, and only run the range of sedans, muscle cars, pick-ups, and beetles. There are no war rigs like in the movies, no motorcycles, etc.

Outcomes

There is only one basic outcome of the game. You have a final confrontation with Scabrous Scrotus in which he, the Magnum Opus, and Chumbucket all die. Hope was killed previously, as was her daughter, Glory. Max is on his own again, and he has Scabrous Scrotus's car in which to continue his journey.

After this event, you can continue to play the game and destroy enemy bases, complete races, etc. The Magnum Opus and Chumbucket are resurrected for this, which although very gamey, makes sense in terms of gameplay. After all, you can only make use of the Magnum Opus's weapons if Chumbucket is present, and without the weapons it is basically impossible to take down the defenses of a base, eliminate snipers, take down totems, etc.

Dynamic Elements

Besides the elements discussed below, the world of Mad Max is itself somewhat dynamic. As you drive around, you have the chance to encounter Scrotus's patrols, and this probability is affected by the threat level in the region. There is also the chance to encounter a sandstorm, and this seems to be randomly triggered.

Dynamic friction is used in many areas. As you unlock higher and higher upgrades for Max's combat abilities, and for his car, the prices in scrap of course increase.

This manifests in the Fury Meter you have during combat. This is set on a timer, so it will inevitably empty and you will have to continue your combos in order to fill it again.

The main manifestation of this is the car customization. As mentioned before, you can create a large variety of cars that fit your play style.

The stopping mechanism is used to prevent the player from abusing the base upgrades and the Magnum Opus weapons. The weapons all have a limited amount of ammo, and there is a several second delay between uses of the weapons. As for the bases, there is a 20-30 minute delay between refill times.


Dramatic Elements

Characters and Story

The story does not follow any of the movies or other media exactly, but takes heavy inspiration from almost all of them, especially from the third movie and from the comic book series prequel to Mad Max: Fury Road. As an example, in Mad Max: Beyond Thunderdome, there is one character called Blackfinger, and in the game this is expanded out into a huge cult or religion of car worshiping mechanics whose fingers are of course black from working with grease all day.

Max has already been discussed at some length, as has his mechanic/blackfinger, Chumbucket. Other characters are Jeet, Deep Friah, Gut Gash and Pink Eye. These are the leaders of the friendly bases, and you can learn a little about them through dialogue and by completing missions. Crow Dazzle is the MC for the races, and for enemies you have Stank Gum and Scabrous Scrotus. We don't really learn much about the main villains. Stank Gum likes to wear people's skins, and Scabrous is just a big evil dude who took your car, and also happens to be one of Immortan Joe's sons. As mentioned before, the "top dog" enemies are all just reskinned versions of Scrotus, so there is very little personality there.
Last of all there are Hope and Glory. These appear to be non-canon versions of characters with the same names from the comic book series.
In terms of the actual story, while rich in lore and environmental details, the plot is very lite. Following being left for dead and having your V8 engine stolen, you quickly find Scrotus's dog, which Chumbucket is about to eat. Max saves the dog, and you and Chumbucket team up. Chumbucket agrees to be your mechanic in exchange for help finding parts for his Magnum Opus, a car that he is building and one which he attends to with religious and sexual devotion. To get the parts, you need to scavenge locations under the control of different groups of War Boys. Along the way, you will do missions for the leaders mentioned above, who will often give you information or weapons that enable your further progress.
Eventually,you will make it to Gas Town, compete in a race and Thunderdome style duel in order to get the V8, only to discover that Scrotus was still alive. He recognizes you, and you must fight him. This proves too much for Max, and Hope must rescue you. This triggers a number of missions to reunite Hope and her daughter, Glory. This also brings to a head the situation with Chumbucket: now that Max has what he needs, he no longer wants Chumbucket's company, and this triggers a break between the two. Max must leave to find Chumbucket, who has stolen the Magnum Opus. While Max is away, Scrotus and Stank Gum torture Chumbucket, and discover the location of Hope and Glory. When Max finds Chumbucket, Scrotus has already left, but Stank Gum is still there. Max kills Stank Gum, and returns to find Glory and Hope dead.
Chumbucket and Max team up one more time to kill Scrotus. After destroying Scrotus's convoy, you will have to use the Magnum Opus to push him over the edge of a cliff. Chumbucket refuses to leave the car, and so all three (Chumbucket, Scrotus, and the Magnum Opus) die.

Conclusion

Mad Max lacks a lot of elements that other open world games have. You won't find any animal skins to hunt and craft into holsters or pouches. You won't find any plants to collect and craft into medicines. You won't have any reputation tracking or a morality system. Nor will you be tasked with tracking down 11 different kinds of useless collectible objects. You will not be running out of energy and be forced to stop what you are doing to get some food, or suddenly become thirsty and need water, since this is not a survival game.
The main word that comes to mind as I wrap up this analysis is focus. Avalanche Studios has taken an iconic IP, and stripped it down to its barest essentials, and developed each one to the fullest. Mad Max, as a world, is about beating the shit out of bad guys and driving through a desolate landscape, and this game delivers that in spades. You get a great, although somewhat flawed, melee combat system, and you get great driving and vehicular combat. The story stays true to the ethos of the originals, and the design of the characters and world is excellent throughout. In terms of character and enemy design, my only bone to pick is with the lack of variety in the Top Dog Enemies.
Like a tough survivor out of the wasteland, Mad Max the game has been stripped of fat and is a lean experience. Even 5 years after its release, it remains a great play and a game well-worth your time.

Monday, January 4, 2021

Metal Gear Solid V: The Phantom Pain Analysis

Overview

Metal Gear Solid V: The Phantom Pain is a third-person open world action stealth game developed and published by Konami in September 2015. It is a single player game, with limited options for multiplayer.

Formal Elements

Players

In the game, you play as "Venom" or "Punished" Snake, and many characters will refer to you as Big Boss. You are the leader of a private military force, and you've just woken up after a coma of 9 years. You lost the lower half of your left arm, and you have a huge piece of shrapnel embedded in your forehead. You control Big Boss from a third-person perspective, but you can aim down the sights of your weapons in first person, and when you crawl through small spaces the camera also switches to this perspective.

You can play some missions as soldiers that you convert to your army.

Rules

Combat and Movement

As Big Boss, you get your left arm replaced by a robotic one before your first mission. You can thus use larger, two-handed weapons like rifles and rocket launchers. The movement system is limited to walking, running, crouching, crawling, and climbing on some surfaces. You can only walk or run up slopes of a certain angle, and this will lead to a lot of periodic frustration, as slopes that look climbable are sometimes not, and you will repeatedly slip down them. Crouching and crawling reduce your visibility, making it easier to sneak by enemies.

Most knee-high or wait-high ledges can be climbed over, and if there is a sharp edge or ledge, you can even jump up to head-high ledges. You can discover vertical cracks in many locations that can be crack-climbed.

Besides moving around under your own power, you can make use of a horse, D-Horse, different kinds of trucks, tanks, and later on, D-Walkers. There are two main maps, Afghanistan and Africa, in the game, and both are quite large and rugged. You can run from one area to another, but the maps are so large that it will take 5-10 minutes of sprinting. Vehicles function quite realistically, generating light and noise that will alert enemies nearby. They also have varying degrees of difficulty in traversing the rugged terrain. Vehicles take damage realistically as well, and if they take enough damage they will become immovable and eventually blow up.

There are two more ways of moving around. The first is by using your support helicopter. As you play, you will probably destroy enemy radar dishes which will unlock new landing zones. You can call your support helicopter to come and pick you up. Once you return to your aerial command center, you can pick an alternative landing zone closer to your goal.

Another way is by picking up shipping invoices at enemy bases. You can attach these labels to your cardboard box, if you have it equipped, and you can ship yourself from one enemy base to another using this method of "fast travel." This only works if you are at a shipping station, of course.

Moving on to combat, MGS V features both ranged and melee combat, but the primary focus is on stealth combat. As you attempt to complete a mission, you will usually approach an enemy base and do some scouting. You can use your companions to help you identify enemies and other points of interest, and you can also use a special scope to place markers or tag enemies. Although you are not punished for engaging in combat, there are a number of indirect costs. As you encounter enemies, you can take them out in a number of ways. For example, depending on which companion you have, you might be able to distract them, stun them, or kill them without getting your hands dirty. You can approach them in a stealthy manner, get behind them and choke them out. Once choked out, you could use your Fulton extraction device to send them back to Mother Base, kill them, and/or hide the body. You could use different weapons to eliminate them, either lethally or non-lethally. Depending on the weapon you use, this may alert other nearby guards. If you don't hide the body, it is possible that patrolling guards may find it, and raise the alert level of the base. If you draw your weapon and approach a guard, they will lay down their weapon and you can choke them out or pursue the other options outlined above. Besides choking an enemy out, you can interrogate them (provided you have an interpreter for the language) and get information about the base, high value targets, or valuable resources.

Depending on your stance, your camouflage, the amount of light, the surrounding shrubbery, the amount of noise you make, and even how smelly you are, you will attract attention. This is shown by a white fuzzy ring around your character pointing in the direction of enemy attention. This can make the enemy leave their post or abandon their patrol to investigate the area. If the amount of suspicion crosses a limit, the enemy will "detect" or "spot" you.

If an enemy spots you and no other enemies in this area have been alerted, you will get a brief period of "reflex time," where time slows down and you can quickly close the distance and choke them out, tranquilize them with your tran gun, or use another means of silencing them.

You can also go loud if you are discovered, or you can back off and try to hide. The base guards will try to find you based on your last-sighted position, as well as noises and suspicious sights.

As you interact with the bases, enemies will begin to adapt to your tactics. For example, many bases will begin to place land mines in strategic locations, enemies will begin to wear body armor or helmets, depending on your preferred target. If you mostly attack at night, more spot lights will be placed and enemies with night vision goggles will spawn in.

Base Development

As you play the game, you will extract soldiers, vehicles, placed guns, and resource containers using your Fulton extraction device. This starts out as a balloon that you can use only on soldiers, but you can upgrade it for placed guns, then for vehicles and resource containers, and through a hidden path, you can even develop a black hole version. Soldiers each have unique names, and random special abilities, as well as being ranked in categories like combat, base development, support, communications, medicine, and research. These soldiers can be convinced to join your private army, and they will contribute to the productivity and level of the section they are assigned to. 


Certain soldiers have specific traits that affect other staff, or that allow specific development options. For example, a staff member might have a "troublemaker" trait, which increases the chances of fighting among staff, whereas "diplomat" effectively cancels this. In terms of development, if you want to develop certain Fulton upgrades, you will need a soldier with "Transportation Specialist." There are close to 30 of these specialist traits.

In terms of staff contributions, if you capture a soldier with an A rank in research (as an example), you can assign that soldier to that section, and they will increase the level of that section, allowing you research more advanced weapons or equipment. Assigning a solider to base development effects the speed with which unprocessed resources get processed. As some technologies require a certain number of processed resources, this of course comes in handy. Alternatively, assigning a soldier to intel increases the number and accuracy of intel reports you receive when in the field. These could concern the placement of enemies, updates about the weather, etc. 


Each section has a limited number of positions available, and you must build dedicated base platforms for each section, and upgrade each one in order to expand the potential number of staff for each one. Each platform can be upgraded to level four, further expanding the staff limit of the section by 10 each time, except for the command platform, which increases the staff limit for all sections by 5. Each upgrade costs exponentially more money, time, and resources. If you want to go beyond these limits, you will need to purchase further FOBs (forward operating bases) around the world. Each FOB costs exponentially more "Mother Base" coins, encouraging the player to engage with the microtransaction system KONAMI has created.

Once purchased, the FOB works essentially the same as Mother Base. You must build a command center platform, and then you can build and upgrade platforms for the other sections. With FOBs, the exponential costs have been doubled down on, so each upgrade requires much more money, time, and resources than the one before it. It is not easier to acquire these, however, creating a strong FU feeling in the player.

You can travel to Mother Base and explore it, and you can also interact with the soldiers there. When a soldier sees you, it will raise their morale, making fights among staff less common.

Inventory

MSG V features a simple inventory system. The player may carry two main weapons, one rifle and one sniper rifle/grenade launcher/missile launcher. You may also have two secondary weapons, a pistol or SMG of some kind, and a modification of your prosthetic arm. You can carry 8 support weapons, and 8 items. Support weapons are items like different kinds of grenades, decoys, or mines, while items are things active camouflage, night vision goggles, or your phantom cigar, which allows you to speed up time until particular times of day. Your companions and vehicles also count as inventory items, and you may only have one of each at a time. If during a mission you need more ammo, you can call in a resupply drop, which acts like the reverse of a Fulton extraction: you get a box dropping out of the sky on a parachute to the location that you designated. As many players have noted, you can actually use this to knock out guards!

You can also request different vehicles, buddies, and weapons using this air drop system.

One point to mention about deploying to an area is that each item, weapon, vehicle, and buddy has a deployment cost. The higher the level of the item, the more it will cost you. This applies to the items you bring with you on the initial deployment, as well as those air dropped in during deployment.

You can equip any weapon or item that enemies drop, but this will cause you to drop your currently equipped item. So, for example, if I have a sniper rifle, but I want to take out a helicopter, I can pick up a rocket launcher that an enemy has dropped. Since sniper rifles and rocket launchers occupy the same slot, I will drop the rifle and equip the launcher.

Procedures

Watching a cut-scene

This is a Hideo Kojima production after all. There are cut-scenes in the game, although from what I understand they are somewhat restrained compared to previous Hideo Kojima titles.

Trading

Using your iDroid device, you can sell resources and items you have at your Mother Base. Unfortunately, and quite illogically, for the player, you cannot buy resources. This again is probably to force engagement with the microtransactions that KONAMI has created.

Complete a mission

There are 50 main story missions, and 157 side ops. The main story missions all open with a cut scene and voice over explaining the context and the goals, while the side ops are open world filler of the kind that Ubisoft made famous. The main missions are timed, and each has a number of hidden optional objectives. For example, you might be trying to extract a scientist, and to complete the mission you must of course do this objective. However, you might have a bonus objective of extracting him using the Fulton device in a particular way, or there might be an bonus objective to rescue a prisoner nearby, etc.

Completing the mission within certain time limits, without being seen, without killing soldiers, and without raising the alarm all give you bonuses, as do completing the optional objectives. The missions have a large variety of settings and optional objectives, and there are many twists that appear during story missions.

The side ops are a trash heap. As an example, you can clear mines from mine fields. This involves going to the location, and then walking around shooting the mines until the area is clear. There are 10 of these. Ten! Or, there are 16 side ops which ask you to eliminate groups of heavy infantry. These are heavily armored soldiers that are not vulnerable to most small caliber weapons. You can use tanks, missile launchers, or you may sneak up on them, choke them out, and Fulton extract them to your Mother Base if you deem fit. But there are 16 of these missions! The number of the soldiers is slightly different, and they are in different parts of the map, but it is essentially the same challenge. Then there are the missions about extracting a wandering mother base soldier, extracting a prisoner, extracting a valuable soldier, or eliminating tank or armored-vehicle units. All of these appear in double digit numbers, are repetitive, and quite boring after the first few in each group. They do provide a decent amount of GMP in the higher ranks, but you can still earn more passively doing combat deployment.

Manage Mother Base

Mother Base is where you can check up on your soldiers, take a shower, and raise the morale of your staff. Mother Base requires a lot of management, and the game does a great job of simulating this. You can view all your staff via a menu, and sort them according to various characteristics. You can switch their section, and you can even enter direct contracts with them or dismiss them. Direct contracts prevents them from dying, being abducted from FOBs, or being sent out on dispatch missions.

Besides this, you will be able to build new platforms to expand your military capacity and increase the level of your different sections. You can also begin different research projects to unlock new weapons and items.

Assign Combat deployment

Using your iDroid device, you can also assign different combat teams to take on combat missions. Some of these can counteract the AI's adaptation to the your play-style. For example, if enemies have taken to wearing helmets all the time, you can send some of your soldiers on a mission to destroy the enemy's supply of helmets, making it easier for you to play the way you've become accustomed to. 


Alternatively, you can send your staff on combat missions to recruit new staff members with certain proficiency, gather plants or other resources, or just to engage in different lucrative missions, such as protecting a VIP or contracting to keep the peace in some war-torn area of the world. These missions vary roughly lineally in difficulty, benefits, and time required.

Listen to music or interview

There are hundreds of tapes scattered throughout the map, and many can additionally be picked up automatically by completing story missions. These give the player the opportunity to hear extra information. Many of these are exactly the same as the mission briefing tapes, but there are still some interesting revelations.

Resources

There are a large number of different resources.
  • Health: Your avatar has rechargeable health like in many shooter games that came out after Gears of War. If you continue to take damage, you will eventually die, but if you can hide, your health will slowly recharge.
  • Staff: Your staff are an important resource that influences the power and efficiency of your private military organization. You can send the combat section on deployment missions to earn GMP, more staff, or resources. They can be killed during these missions, and other players can attack your FOBs and steal them from you.
  • GMP: GMP stands for gross military product, and it appears to be a kind of terminological joke by Hideo Kojima. It is the money in the game, and serves several purposes. First, you receive it as a reward for completing missions. You can spend it on base development, research projects, and on deployment to the two fields of operations.
  • Ammo: You can only carry a limited amount of ammo for each weapon at a time, but you can replenish this by walking over similar class weapons, finding ammo packs in a base, or by calling in a supply drop.
  • Vehicles: You eventually gain the ability to Fulton extract vehicles and bring them back to your Mother base, and you can then deploy with these during main missions and side ops.
  • Mother Base Coins: You receive a small number of mother base coins for each day you log in to the game, but this number is purposefully kept minuscule in relation to what you need to purchase in order to encourage microtransaction purchases. Fuck you Konami!
  • Private Force Points: Each day your soldiers will engage in in pitched battles against other players', and you will receive private force points for your victories. You can exchange these to purchase high-level staff, and different amounts of resources.
  • Weapons: Your weapons are critical resources. You need to consider the parameters of the mission and what you are likely to face, but you will probably develop a liking for a particular play-style revolving around certain weapons.
  • Plants: As you explore, you will find different varieties of plants growing in the world. When you pick them up, they get sent to Mother Base automatically. To increase the amount of plants you get more quickly, you can send your soldiers out on dispatch missions, or you can purchase them by exchanging PF points.
    • wormwood
    • black carrot
    • golden crescent
    • tarragon
    • African peach
    • digitalis purpurea
    • digitalis lutea
    • Haoma
  • Materials/Resources: There are several kinds of materials:
    • Common metal
    • Precious metal
    • Biological resources
    • Fuel resources
    • Minor metal
  • These resources can be acquired in several ways. You can often find small containers of the different metals and other resources around enemy bases. However, you will also find large cargo containers of the resources at enemy bases, which you can extract using your Fulton device after it has been upgraded enough.
  • Base Section Level: Each base section has a level, and this is controlled by the number and quality of the staff assigned in each section.
  • Base Section Platform Number: Each section can be upgraded to four platforms in one base.
  • Number of Bases: Besides Mother Base, you can purchase offshore waters in which to build FOBs. These allow you to build more command, intel, research, etc platforms and continue to increase the section level and hire more store, potentially unlocking more research options. As mentioned before, additional FOBs are purchased with Mother Base coins, which are extremely limited. You get 15 per day, and buying an additional FOB location might cost over 1100 coins. Again, fuck you Konami.

Conflicts

There are a number of interesting conflicts going on in MGS V. For one, there is the conflict between being stealthy and going loud. It is possible to complete the game without killing anyone, for example, and instead always using a tranq gun or other non-lethal means of subduing them. If you traq an enemy, you can Fulton extract them out to Mother Base, where they will become one of your loyal soldiers. This provides a diagetic motivation for at least not killing everyone. You also receive post-mission bonuses for being non-lethal, and for maintaining perfect stealth. However, the game is much, much easier if you occasionally kill soldiers, and if you allow yourself to go loud.

There is also a conflict between continuing and developing your preferred playstyle, and the AI system's continuous adaptations to that. If you really like taking headshots from a distance, the enemies will start to wear helmets, and later on full body armor with face-plated helmets. It is still possible to eliminate these soldiers with headshots, but it requires extreme precision and timing in the former case, and anti-vehicle sniper rifles in the latter.

Boundaries

There are strict inventory limits. As discussed before, you can only have one rifle/SMG/shotgun and one larger two-handed weapon equipped at a time. This, together with ammo limitations, serves to restrict your playing options in interesting ways. Of course, it is possible to pick up an enemy's weapon, and to request a weapon air drop, but these are not always feasible in the heat of the moment.

Outcomes

Like many open world games, there is no definitive end to the game. However, if you complete the main story missions, you will destroy the main villains and prevent their plans for world destruction/domination from reaching fruition. The mission called The Truth, however, turns all this horrifying on its head, but more on that later.

Dynamic Elements

The dynamic friction pattern appears pervasively. In terms of base section level, it takes more and more staff at higher and higher competencies in order to increase the level of the base section. This requires a large number of FOB bases, each of which costs exponentially more than the previously purchased one. Building the platforms and upgrading the platforms in each FOB requires exponentially more time, GMP, and resources. Just as a small example, in terms of time, the first upgrade in Mother Base takes about 30 minutes of in-game time. When you upgrade one of the platforms to level 2 in your second FOB, it takes 6 days! That's a 288X increase in time cost.

Besides the cycle of night and day, there is a cycle in terms of tension. When you are out exploring, the tension is typically low. As you get closer to an enemy outpost, the tension will increase some, and if you are proceeding with a mission, it will ratchet up accordingly as you try to avoid detection.

The playstyle reinforcement pattern appears in a negative form in the fact that enemies in bases react to how you infiltrate them and how to eliminate them in order to guard against you. Instead of encouraging the player to stick to the same tactics, you are forced to explore the play space and try alternatives to the same strategies. In its positive form, if you prefer to play in a loud, aggressive way, you can use your resources to research more assault rifles, grenade launchers, etc. When you clear out a base, you can then Fulton the resources back to Mother Base, allowing you to unlock more aggressive research options.

The worker placement pattern appears as literally assigning staff to different sections and receiving benefits based on the assignments.

The trade pattern appears in a limited way. As mentioned before, you can only sell resources to receive GMP, and never buy them using GMP. If you want to buy resources, you need to purchase them using real money. Fuck you, Konami.

The converter engine appears in a few forms. First, and most obviously, the number and level of platforms in a particular section determine the productivity and effectiveness of that section. In particular, the base development section takes unprocessed resources and converts them to processed ones. The rate at which it does this is controlled by how advanced the section is, so you can control the efficacy by your investments.

The stopping mechanism appears mainly in the form of boundaries and limits on marking soldiers, time limits for supply drops, and limits on your mission rank based on your equipment and helicopter support. If you equip the stealth camouflage, which effective makes you invisible for short periods of time, you are restricted to A rank or lower for that mission.


Dramatic Elements

Characters and Story

Upon escaping from the hospital where you were held, you are flown to the Seychelles where remnants of your force have created a "Mother Base," which looks like an oil rig or drilling platform. You are fitted with a prosthetic arm to replace your lost left arm, and one of your companions, Ocelot, tasks you with rescuing Lt. Kazuhira Miller, also called Kaz. He is being held prisoner in a Russian military base in Afghanistan. Upon rescuing him, you will be given further missions relating to the incident shown in what is called the playable demo to Metal Gear Solid V: The Phantom Pain, Metal Gear Solid V: Ground Zeroes. In this playable demo, you infiltrate an XOF (the counterpart to the FOX group that Snake belonged to) base and make some discoveries, following which the mother base you had been building in the Caribbean is destroyed by XOF. Your helicopter is blown up, and you suffer from grievous injuries, resulting in the 9 year coma you awaken from at the beginning of the game.

Miller thirsts for revenge, as his dreams were destroyed, and he lost both an arm and leg to torture. The rest of the game plays out with you basically running errands for Ocelot and Miller in Africa and Afghanistan in order to gather more information about XOF, who is leading it, what they have been doing in the 9 years since they destroyed your base, and what they plan to do now. As a first time player to the Metal Gear Solid franchise, it is really, really fucking confusing. Although this is the last game released, it happens roughly in the middle of the chronology of this game universe.

  • 1964 - Snake Eater (Released in 2004)
  • 1974 - Peace Walker (Released in 2010)
  • 1975 - Ground Zeroes (Released in 2014)
  • 1984 - The Phantom Pain (Released in 2015)
  • 1995 - Metal Gear (Released in 1987)
  • 1999 - Solid Snake (Released in 1990)
  • 2005 - Metal Gear Solid (Released in 1998)
  • 2007 - Sons of Liberty (Released in 2001)
  • 2014 - Guns of the Patriots (Released in 2008)

As you complete these missions, you learn about several different plots revolving around parasites, both parasites that live on the skin, and ones that inhabit the vocal chords. The vocal chord parasites appear to be part of a plan to either eliminate all languages except English, or perhaps to eliminate only English. Different people say different things at different times. The skin parasites have been used to create two units called Skulls, a stealth Skull unit, seen below, and a combat Skull unit. They will appear at several points throughout the game to increase the tension and difficulty of a mission. There is also a plot about metal gears, the large bipedal robots that give the series its name.


To spoil the game a bit, as you continue playing story missions, you will eventually unlock a mission called "The Truth," in which you learn that you are not actually Big Boss. Although you played as Big Boss in Ground Zeroes, when you wake up in 1984, you are the medic on the helicopter. Essentially, you've been brainwashed into believing that you are Big Boss, besides undergoing cosmetic surgery to alter your appearance to match that of Big Boss. Ocelot and Miller are both aware of this, and this ties into the events of the first game in the franchise, Metal Gear, released in 1987. In that game, you play as Solid Snake, who receives orders from someone who we can presume to be the real Big Boss. He orders you to infiltrate a base called Outer Heaven and destroy a metal gear. Eventually, you will discover the leader of Outer Heaven to be Big Boss...but this Big Boss is actually the body double that you play as in The Phantom Pain. For some reason, Big Boss has decided to take out his body double. Although it might make sense in some way, in general the story is really overly complicated and does not stand up well to close scrutiny. 
 
To return to analyzing the story of MGS V, it essentially tells the story of you, the player/medic, becoming Big Boss, who is the villain of the next game! So, it turns this fantasy on its head, saying, "You want to be like Big Boss? Here you go. By the way, you realize he's an evil fuck, right?" Even the way that you recruit new soldiers is highly morally suspect. You kidnap these people, then torture them and brainwash them to believe in the Diamond Dogs private military force. These people become your staff!

Besides this reversal, there are not at all subtle references to literature which further establish these themes. Your helicopter is named the Pequod, and in the beginning, the patient who helps you escape the hospital says to you "Call me Ishmael," the famous opening line of Moby Dick. There are also times when you are called Ahab, although it might be more appropriate to name Miller Ahab, as he is one who is driving the thirst for revenge throughout the game. Still, both the game and the book show how a good leader and man can become twisted into something evil by the pursuit of revenge.

A more general reference is the year when the story happens, 1984, after the famous book by George Orwell. As you can tell from the byzantine descriptions above, the game definitely deals with complex political arrangements, where things are bluffed, double bluffed, and there always seems to be another layer underneath, where the truth can be found.


Conclusion

There are a lot of gameplay and UI design choices at work in The Phantom Pain that are similar to those of Red Dead Redemption 2, and they produce similar effects. If you want to leave a combat area and return to Mother Base or your helicopter, you must pick a landing zone, wait for the helicopter to arrive, get in, and wait for it to depart. These are rendered in real-time/in-engine, and the camera is under your control while you are waiting for the helicopter to depart. You may even switch from one side to another and use a minigun to fire at enemies. But it still takes too much time. Yes, it adds in realism and atmosphere to the experience, but why does it require so much work and so much real world player time investment? Why can't you just Fulton yourself out? Similar choices regarding how you search cupboards in Red Dead Redemption 2 come to mind, where you must hold a certain button for longer than a second to begin searching, then hold a different button for longer than a second to pick up a single item, wait for the animation to finish, then hold it again to pick up a second item, etc.

While the systemic effects of sight, sound, smell and the enemy AI produce interesting stealth game-play, and the way that Mother Base management, research progress, and the Fulton extraction of resources and soldiers all interconnect produces great synergy, there are many areas where the design seems purposefully against the player. The main instance that comes to mind is the higher research items, which require extremely high section levels, GMP, resources, and time to unlock. These balancing choices effectively force the player to either grind away for hours and hours, or to give in and buy Konami's in-game currency. When player's have already invested $80 for a full game, it seems piratical to ask for even more money in this way.
 
I don't want to come off as too negative in this conclusion, however. Hideo Kojima and his team of designers, artists, and programmers have produced one of the greatest open world games with a strong focus on stealth, and intimately interlocking gameplay systems. I've completed the main story and many dozens of side missions and dispatch ops over two complete playthroughs, one in 2014 and one in 2020, totaling about 171 hours of play. I quite enjoyed both my playthroughs, and I would not rule out playing it a third time in the future. The game's graphics have aged relatively well, and the gameplay is as sound as ever. It truly is a masterpiece.